How to Tint Side by Side Full Windshields?
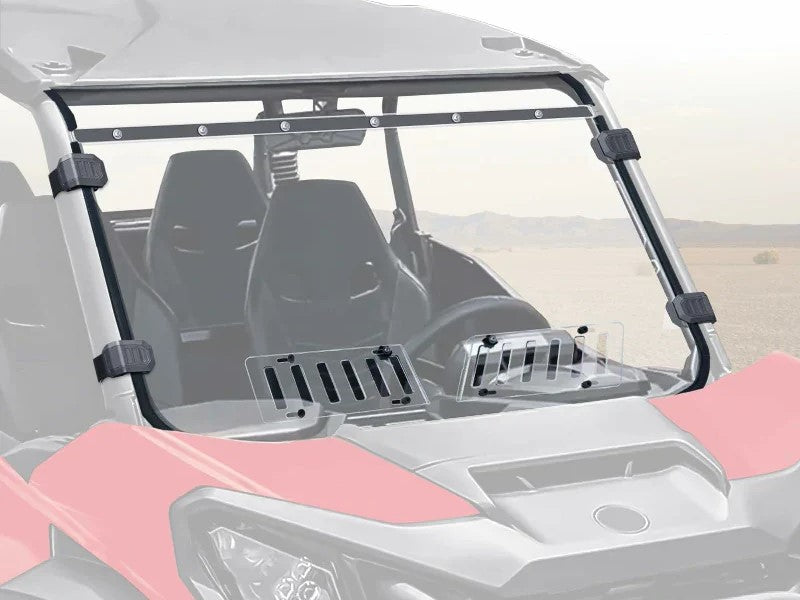
Tinting the full windshield of a side-by-side vehicle offers numerous benefits, ranging from reduced glare to increased privacy. However, the process requires precision and understanding of specific techniques to ensure a flawless finish. This guide offers a comprehensive walkthrough, ensuring you attain professional-level results in tinting side-by-side full windshields.
Benefits of Tinting Side by Side Full Windshields
Tinting the full windshield of a side-by-side not only elevates the vehicle's appearance but also serves several practical purposes, enhancing both its functionality and longevity. Let's delve into these benefits in more detail:
Glare Reduction: One of the most immediate advantages of tinting is its ability to significantly diminish glare. This is particularly beneficial when traversing through areas with intense sunlight or reflective surfaces. By reducing the harshness of light that enters the cabin, tinting helps in maintaining clear visibility, which is paramount for safe driving.
Enhanced Safety: The reduction in glare directly correlates with improved safety. By preventing sudden blinding caused by direct sunlight or reflections, tinting ensures that the driver's vision remains unobstructed, reducing the risk of accidents caused by impaired visibility.
UV Ray Protection: Ultraviolet rays from the sun can be harmful not only to the occupants but also to the interior of the vehicle. Prolonged exposure to UV rays can lead to the fading of the dashboard materials and the seats, making them look worn and aged. Tint films are designed to block a significant portion of these harmful rays, thereby protecting both the passengers and the interior.
Preservation of Interior: Beyond just UV protection, the reduction in solar heat gain inside the vehicle also contributes to the preservation of the interior. This means that materials like leather, plastic, and fabric are less likely to crack or fade, maintaining the aesthetic and functional quality of the vehicle's interior over time.
Privacy and Security: Tinting the full windshield adds a layer of privacy that many drivers and passengers appreciate. It acts as a visual barrier, making it difficult for outsiders to see into the vehicle. This aspect of tinting is particularly valuable when storing valuables inside the vehicle, as it reduces the likelihood of break-ins and theft.
Energy Efficiency: By reducing the amount of heat that enters the vehicle, tinting can help in maintaining cooler interior temperatures, especially during the hot summer months. This leads to less reliance on air conditioning, thereby improving fuel efficiency and reducing energy costs.
Below is a detailed guide on how to tint side by side full windshields:
1. Materials and Tools Required
- Quality Tint Film: Choose a high-quality automotive tint film. It should be durable, offer good UV protection, and be easy to work with. Consider the level of tint you desire, as different films offer varying degrees of darkness.
- Razor Blades or Precision Cutting Tool: A sharp razor blade or a precision cutting tool is essential for trimming the tint film accurately. Ensure the blade is new to avoid tearing the film.
- Squeegee: A squeegee is used to smooth out the film and remove air bubbles. A soft, flexible squeegee is recommended to avoid damaging the film.
- Heat Gun or Hairdryer: These tools are used to heat the film for proper adhesion and to remove minor imperfections. A hairdryer can work if you don't have a heat gun, but it may require more time.
- Soapy Water in a Spray Bottle: Fill a spray bottle with soapy water. This solution helps in positioning the film and aids in the removal of air bubbles.
- Lint-Free Cleaning Cloth: Essential for cleaning the windshield without leaving residues or lint.
- Small, Hard Card for Edges: This tool helps in sealing the edges of the film, ensuring a snug fit.
2. Preparing the Windshield
- Cleaning: Use the soapy water and lint-free cloth to clean the windshield meticulously. Pay special attention to remove all traces of dirt, dust, and grease, as any residue can hinder the film's adhesion.Learn more cleaning ways: How to Clean Your UTV Windshields?
- Measuring: Measure the windshield's dimensions accurately. When cutting the tint film, leave extra inches on each side to ensure you have enough material to work with, which can be trimmed later for a perfect fit.
3. Applying the Tint
- Wet Application: Liberally spray the windshield with soapy water. This layer of moisture is key in positioning the film and avoiding air pockets.
- Alignment: Gently place the tint film on the wet windshield, starting from the center and working your way outwards. The extra inches of film should extend beyond the edges of the windshield, which is critical for proper alignment and coverage.
- Squeegeeing: Starting from the center, use the squeegee to smooth out the film towards the edges. This step requires patience and attention to ensure that no air bubbles or wrinkles are left behind.
- Trimming: With a steady hand, use the razor blade or cutting tool to trim the excess film. It's important to cut precisely along the windshield's edges for a clean, professional look.
4. Finishing Touches
- Heating: Apply gentle heat using a heat gun or hairdryer. This step helps the film to adhere smoothly and removes any small imperfections or creases.
- Edge Treatment: Firmly press down the edges with a small, hard card. This ensures a tight seal and prevents peeling.
- Inspection: Conduct a thorough inspection of the windshield, checking for any air bubbles, misalignments, or loose edges.
5. Aftercare and Maintenance
- Curing Time: Allow the tint to cure for at least 48 hours. During this time, avoid cleaning or heavy use of the vehicle to allow the film to set properly.
- Cleaning: For cleaning, use mild soapy water and a soft cloth. Avoid using harsh chemicals or abrasive tools that can damage the film.
6. Troubleshooting Common Issues
- Air Bubbles: If you notice small air bubbles, gently heat the area and use the squeegee to push them towards the nearest edge.
- Peeling Edges: In case the edges start peeling, reapply heat and press down firmly with the hard card to reseal them.
By following these detailed steps, beginners can successfully tint their side-by-side full windshield, ensuring a professional finish. Remember, patience and attention to detail are key in achieving the best results.
Conclusion
Tinting your side-by-side full windshield can be a rewarding DIY project. It not only enhances the vehicle's aesthetic but also provides practical benefits. By following these detailed steps and employing patience and precision, you can achieve a professional-looking tint job that stands the test of time.
Q&As
Q1: Can I tint my side-by-side windshield myself, or should I hire a professional?
A1: Tinting a side-by-side windshield can be a DIY project if you have the patience and attention to detail. The process involves careful measurement, cutting, and application, which can be done at home with the right tools and instructions. However, if you're not confident in your ability to achieve a smooth, bubble-free finish, it might be worth hiring a professional.
Q2: How do I choose the right tint film for my side-by-side?
A2: When selecting a tint film, consider the level of UV protection, the tint percentage (how dark it is), and the film's quality. Look for films specifically designed for automotive use. Higher-quality films will provide better UV protection and last longer without peeling or fading.
Q3: Is there a specific type of squeegee that works best for applying tint?
A3: A soft, flexible rubber squeegee is ideal for applying tint. It's gentle enough to smooth out the film without damaging it and effective at removing air and water to avoid bubbles and wrinkles.
Q4: How long does it take for the tint to cure, and what should I avoid during this time?
A4: The tint typically takes about 48 hours to cure fully. During this time, avoid rolling down windows (if applicable), and refrain from cleaning the tinted surface. The film is vulnerable during the curing process, and disturbances can lead to imperfections.
Q5: Can window tint be removed if I change my mind later?
A5: Yes, window tint can be removed, although the process can be time-consuming. It involves applying heat to soften the adhesive and gently peeling the film off. Remaining adhesive residues can be cleaned with soapy water or adhesive removers.
Q6: How do I address small scratches on the tint after application?
A6: Minor scratches can often be smoothed out with gentle heat from a hairdryer and a soft squeegee. However, if the scratch is deep or the film is torn, it may require patching or replacing that section of the tint.
Q7: Is there a legal limit to how dark my side-by-side's windshield tint can be?
A7: Legal limits on tint darkness vary by region and vehicle type. It's important to check local laws regarding tinting to ensure compliance. Generally, a certain level of visibility must be maintained for safety reasons.


Leave a comment