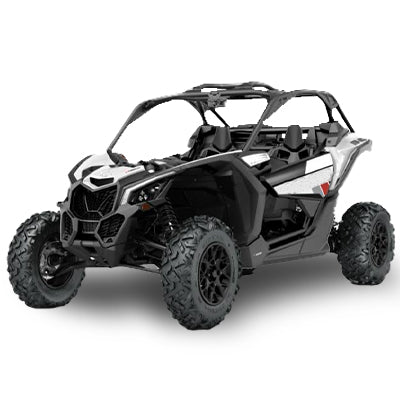
How To install wheel bearing grease on a Can-Am Maverick X3
Wheel bearing grease plays a crucial role in maintaining the performance and longevity of the vehicle's wheel bearings. By lubricating and protecting these vital components, wheel bearing grease ensures smooth operation, reduces friction and wear, and safeguards against contaminants. In this blog post, we will explore the significance of wheel bearing grease and provide a step-by-step guide on how to install it on the Can-Am Maverick X3.
-
Understanding the Importance of Wheel Bearing Grease:
Wheel bearing grease serves several essential functions:
- Lubrication: It forms a protective layer between the metal surfaces of the wheel bearings, minimizing friction and reducing wear and tear.
- Sealing: The grease fills gaps within the bearings, acting as a barrier against water, dust, and debris, preventing damage and maintaining optimal performance.
- Rust Prevention: Wheel bearing grease often contains rust inhibitors, shielding the bearings from corrosion caused by moisture and adverse environmental conditions.
- Shock Absorption: The grease absorbs shocks and vibrations, enhancing stability, comfort, and minimizing stress on other vehicle components.
-
Step-by-Step Guide to Installing Wheel Bearing Grease on the Can-Am Maverick X3:
Follow these steps to install wheel bearing grease efficiently:
Step 1: Prepare the Vehicle
- Lift the Can-Am Maverick X3 using a jack or lift, ensuring it is secure on a level surface.
Step 2: Remove the Wheel
- Utilize a lug wrench to loosen the lug nuts, then remove the wheel from the hub carefully.
Step 3: Access the Wheel Bearing
- Depending on your Maverick X3 model, you may need to remove the brake caliper and rotor to access the wheel hub assembly, where the bearing is located.
Step 4: Clean the Wheel Bearing
- Use a clean cloth or paper towel to thoroughly clean the wheel bearing and surrounding area, ensuring the removal of any dirt, debris, or old grease.
Step 5: Apply the Grease
- Choose a high-quality synthetic wheel bearing grease and apply an adequate amount to the bearing. You can use a grease gun or gloves to ensure even distribution.
Step 6: Distribute the Grease
- Rotate the wheel bearing manually to distribute the grease evenly throughout the bearing, ensuring all areas are adequately lubricated.
Step 7: Reassemble the Components
- If the brake caliper and rotor were removed, reinstall them securely, aligning and tightening them according to the manufacturer's specifications.
Step 8: Mount the Wheel
- Place the wheel back onto the hub and hand-tighten the lug nuts.
Step 9: Lower the Vehicle and Torque the Lug Nuts
- Carefully lower the Can-Am Maverick X3 from the jack or lift. Then, use a torque wrench to tighten the lug nuts to the recommended torque specification, as outlined in the vehicle's manual.
Step 10: Repeat for Other Wheels
- If desired, repeat the entire process for the remaining wheels of the Can-Am Maverick X3.
Conclusion:
Proper installation of wheel bearing grease is essential for maintaining the optimal performance and longevity of the Can-Am Maverick X3's wheel bearings. By following the step-by-step guide outlined in this blog post, you can ensure that your vehicle operates smoothly, experiences reduced friction and wear, and remains protected from contaminants. Regular maintenance and periodic re-greasing will contribute to a safer, more comfortable, and enhanced driving experience.



Leave a comment